Creating Windows taskpad views for Active Directory management
Large enterprises can't get by with just one Active Directory admin. Learn to use taskpads in Windows to help delegate responsibilities in AD.
The larger an organization is, the more difficult it becomes for a single administrator to manage the entire Active Directory database. Windows allows you to delegate administrative tasks to other admins, and you can help the delegates by giving them an administrative console that is specifically designed for the management tasks they will be performing. This involves creating taskpads.
A taskpad is an element within an administrative console that displays a certain portion of the console tree, which provides links to various administrative functions.
|
||||
To create a taskpad, you have to open the Active Directory Users and Computers snap-in in the Microsoft Management Console (MMC), because opening the Active Directory Users and Computers console directly won't work. To do this, enter the MMC command at the server's Run prompt. When the empty console loads, select the Add / Remove Snap-In command from the File menu. When Windows displays the Add / Remove Snap-In dialog box, click the Add button, and then select the Active Directory Users and Computers option from the list of snap-ins. Click Add, followed by Close and OK.
Now that the necessary snap-in has been added to the console, expand the Active Directory Users and Computers container and select the container you want to base the new taskpad on. Right-click on the container and select the New Taskpad View command from the resulting shortcut menu. Windows will then launch the New Taskpad View Wizard.
Click Next to bypass the wizard's Welcome screen, and you will be taken to a screen asking you what style you want to use for the taskpad. You can create a horizontal list, a vertical list or no list at all. I recommend using the defaults on this screen and clicking Next.
The next screen asks if the taskpad view will pertain to the current tree item only or to all items of this type. Again, I recommend that you go with the defaults and click Next.
You will then be asked to enter a name and description for the taskpad. If your taskpad is based on an organizational unit (OU), then the wizard should list the OU's name as the taskpad's name. This is generally fine, although you may want to add a description.
Click Next followed by Finish to create the new taskpad view. When the wizard completes, Windows will automatically launch a new one called the New Task Wizard. This wizard allows you to create tasks for the taskpad that you just created.
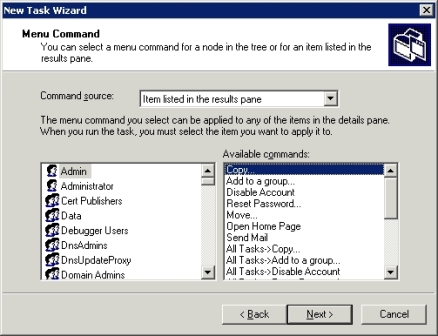
Click Next once again, and you will be asked what type of command you want to create. Be sure that the Menu Command option is selected, and click Next. At this point you will see the screen that is shown in Figure A.
Figure A

The column on the left contains a list of users, and the column on the right contains a list of commands that are available when a user right-clicks on a command. It is important to note that simply making a command available to a user does not give him or her permission to perform that command.
Select a user account and a command and click Next. You are now asked to enter a name and description for the command that you are creating. These fields are filled in by default, so you can just move on to the next screen.
You must now select an icon to represent the task that you are creating. You can use one of the icons that the wizard displays or you can provide a custom icon. Make your selection and click Next.
At this point, you should see a summary of the command that you have created. You could click Finish at this point to complete the wizard, but a taskpad containing a single command won't do anyone much good. If you want to add additional commands to the taskpad, then select the When I Finish Run This Wizard Again check box before finishing.
Locking down the console
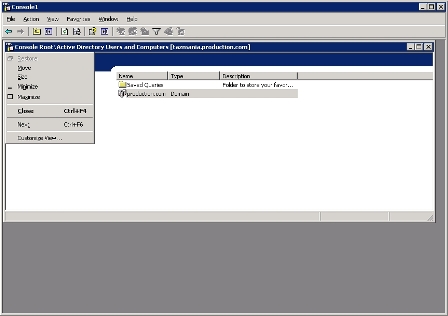
Once you have created a taskpad view, you need to configure the console so that those using it can access the view but nothing else. To do so, click on the console's icon (just below the tool bar), and choose the Customize View option located on the resulting menu, as shown in Figure B. Then just remove everything that you don't want to make accessible through the console.
Once you have removed any unwanted options, choose the Save As command from the File menu, and save your custom console.
Keep in mind that removing console options alone isn't enough to prevent those using it from performing unwanted administrative actions. The console's only job is to make the administrative tasks easier by removing any options for functions that are not permitted. It is still up to you to delegate control in a way that allows others to perform desired administrative actions while preventing forbidden tasks.
 Brien M. Posey, MCSE, has received Microsoft's Most Valuable Professional Award four times for his work with Windows Server, IIS and Exchange Server. He has served as CIO for a nationwide chain of hospitals and healthcare facilities, and was once a network administrator for Fort Knox. You can visit his personal Web site at www.brienposey.com. Brien M. Posey, MCSE, has received Microsoft's Most Valuable Professional Award four times for his work with Windows Server, IIS and Exchange Server. He has served as CIO for a nationwide chain of hospitals and healthcare facilities, and was once a network administrator for Fort Knox. You can visit his personal Web site at www.brienposey.com. |


